How to Manage Participation Codes
Ordinarily, participants need two things in order to complete your sorting tasks: the link (URL) to your study, and their unique Participation Code. However, you can configure your study to allow participants to do your study either with or without a participation code. You can configure this option when creating or editing your study.
Here are the steps to create Participation Codes:
1. Select the Study
After logging into Q Method Software, click on the title of the study in the Study List interface. This brings you to the Study Dashboard and populates the study's sub-navigation.
2. Go to the Participation Codes section
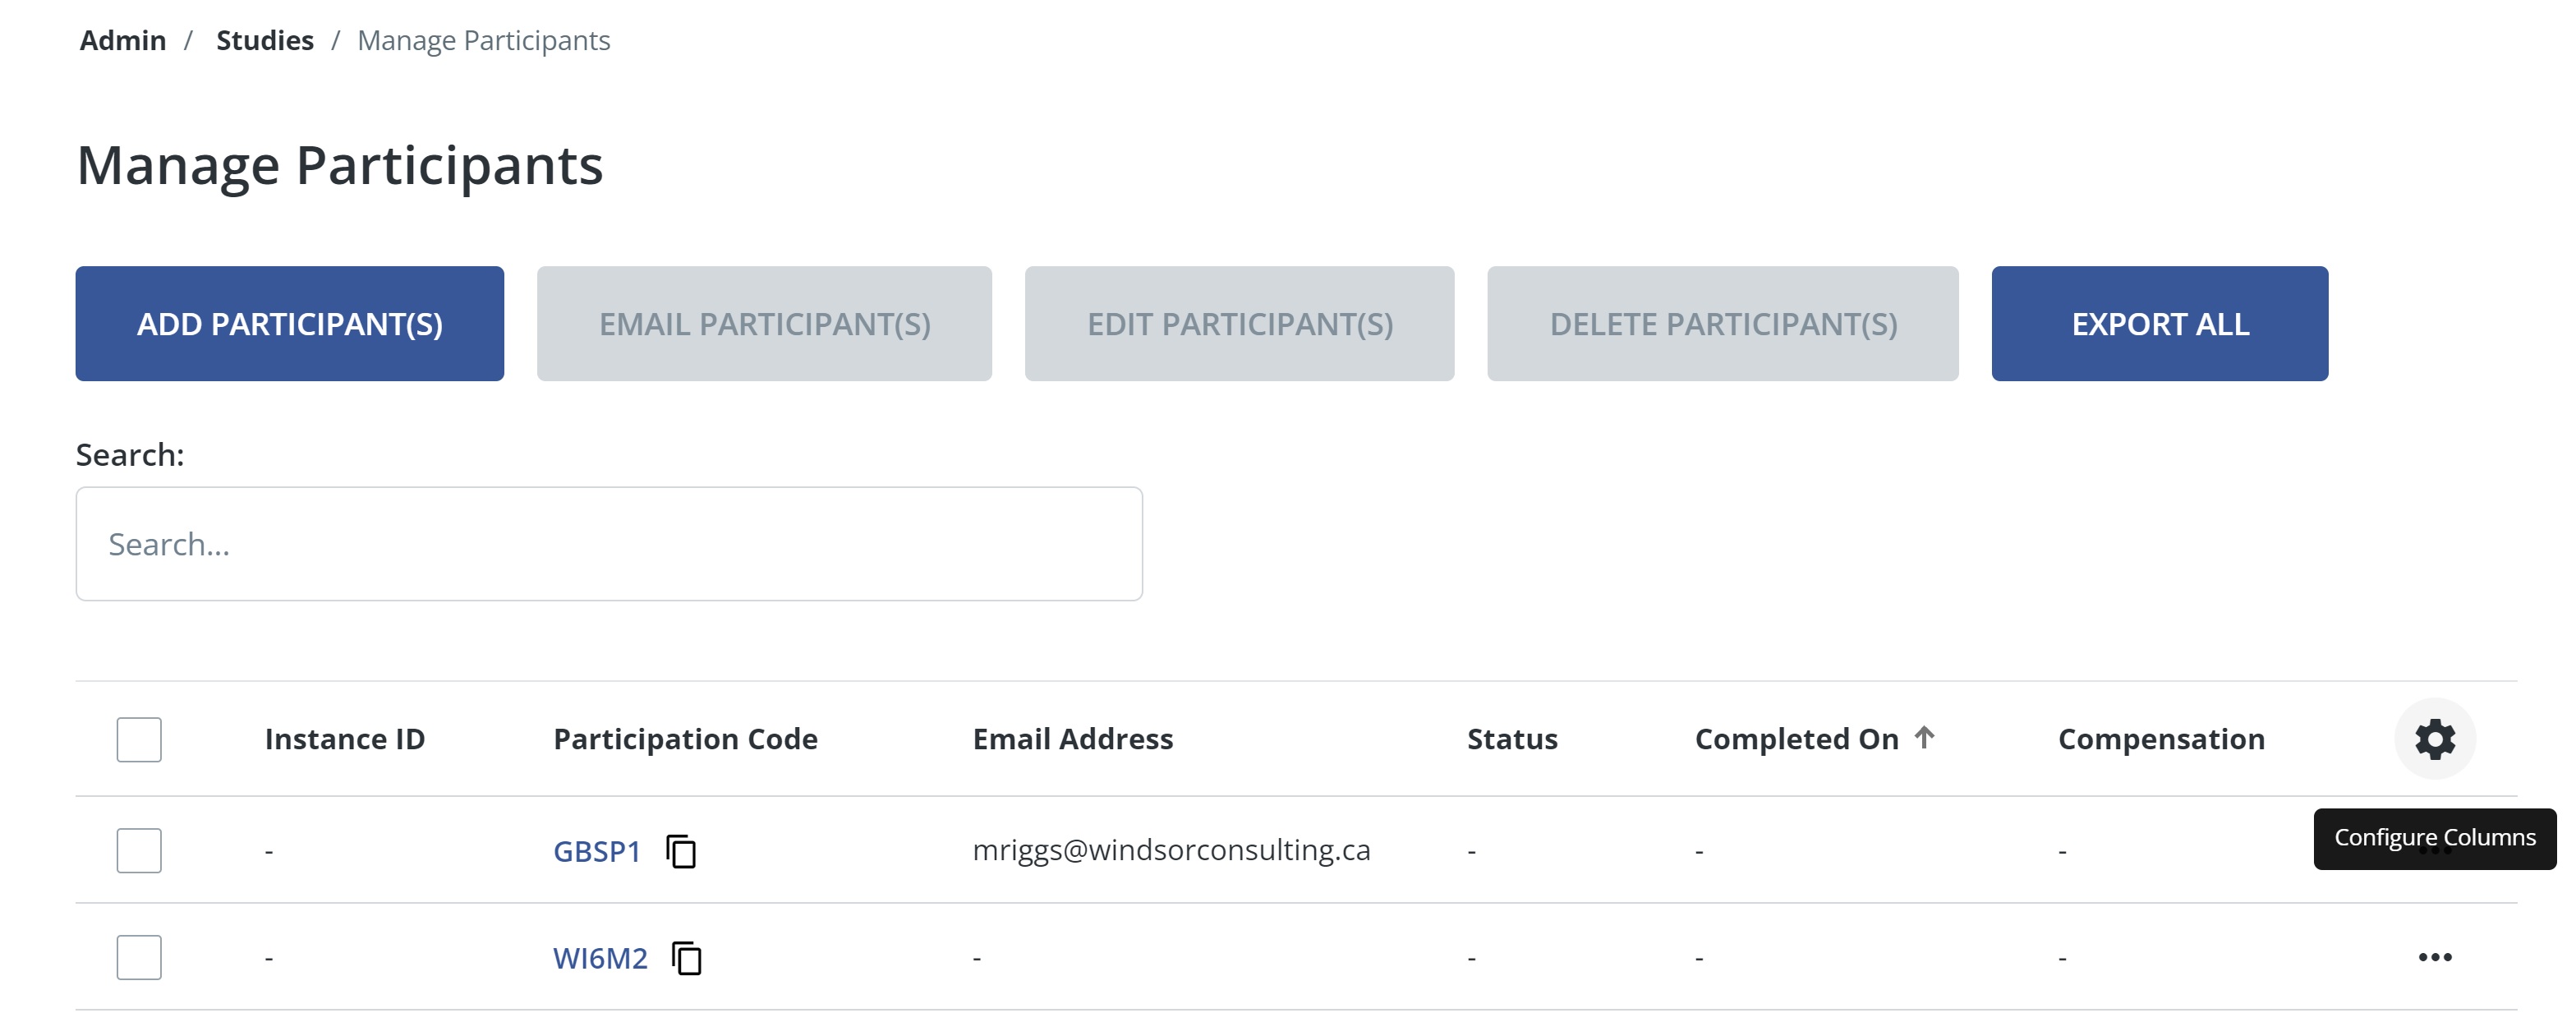
On the study sub-navigation menu, click Manage Participants.
This opens the Participation Codes page. Click Add Participants.
From here, you have three options: generate codes, import codes, or manually enter codes.
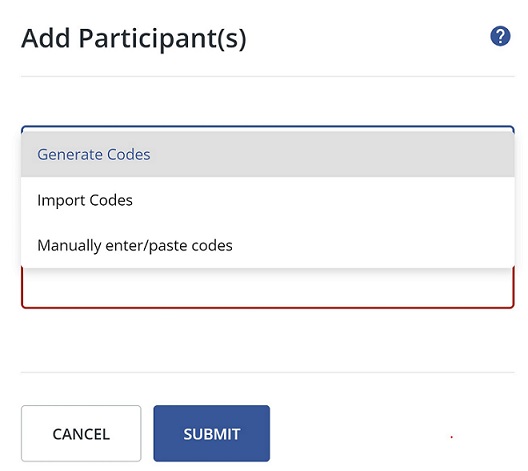
3. Option 1: Generate codes
Click Generate Codes
Specify the number of codes you want. Toggle the up- or down-arrow to find the number of codes you want Q Method Software to generate.
Click Submit. Q Method Software will generate random codes.
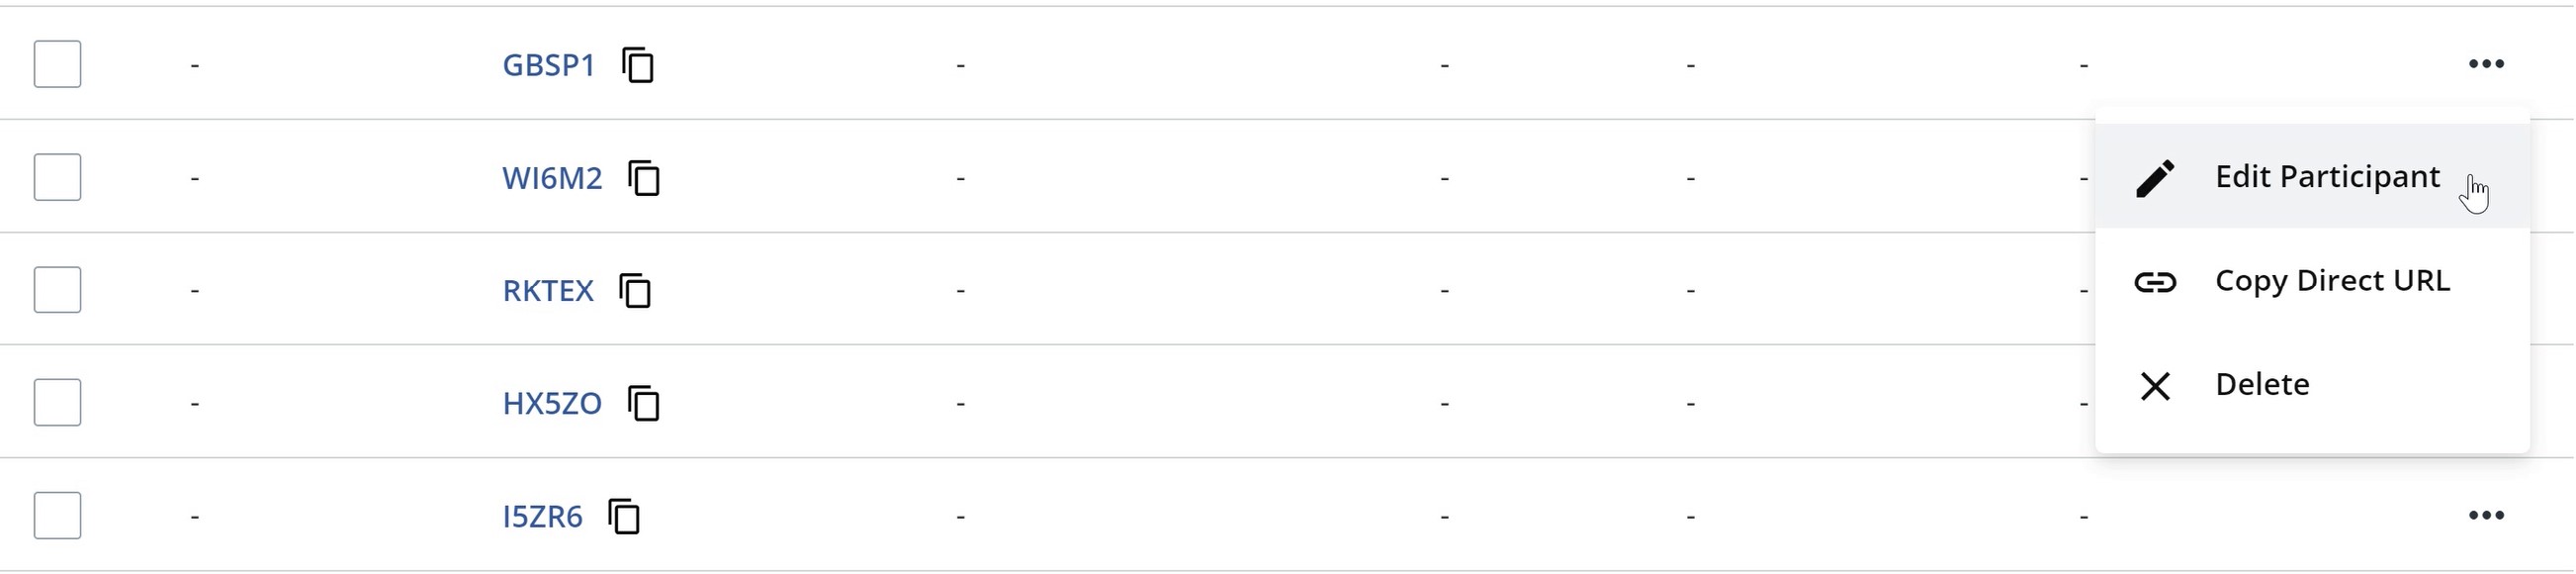
Next, assign each code to a participant. Click the ellipsis beside the code.
Click Edit Participant.
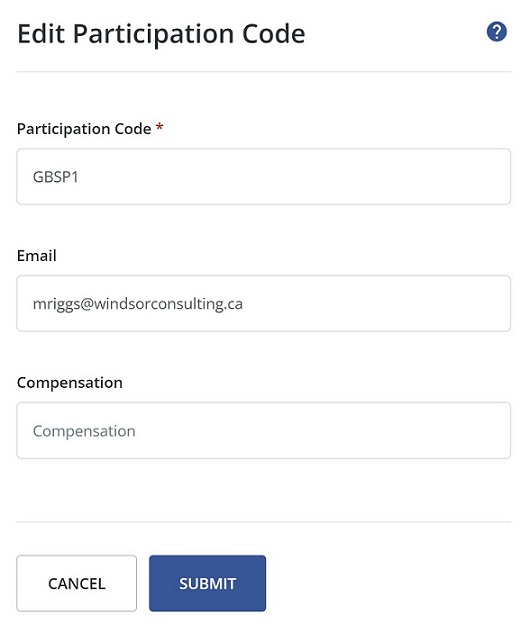
Type in the participant's email address and compensation, if any.
Click Submit.
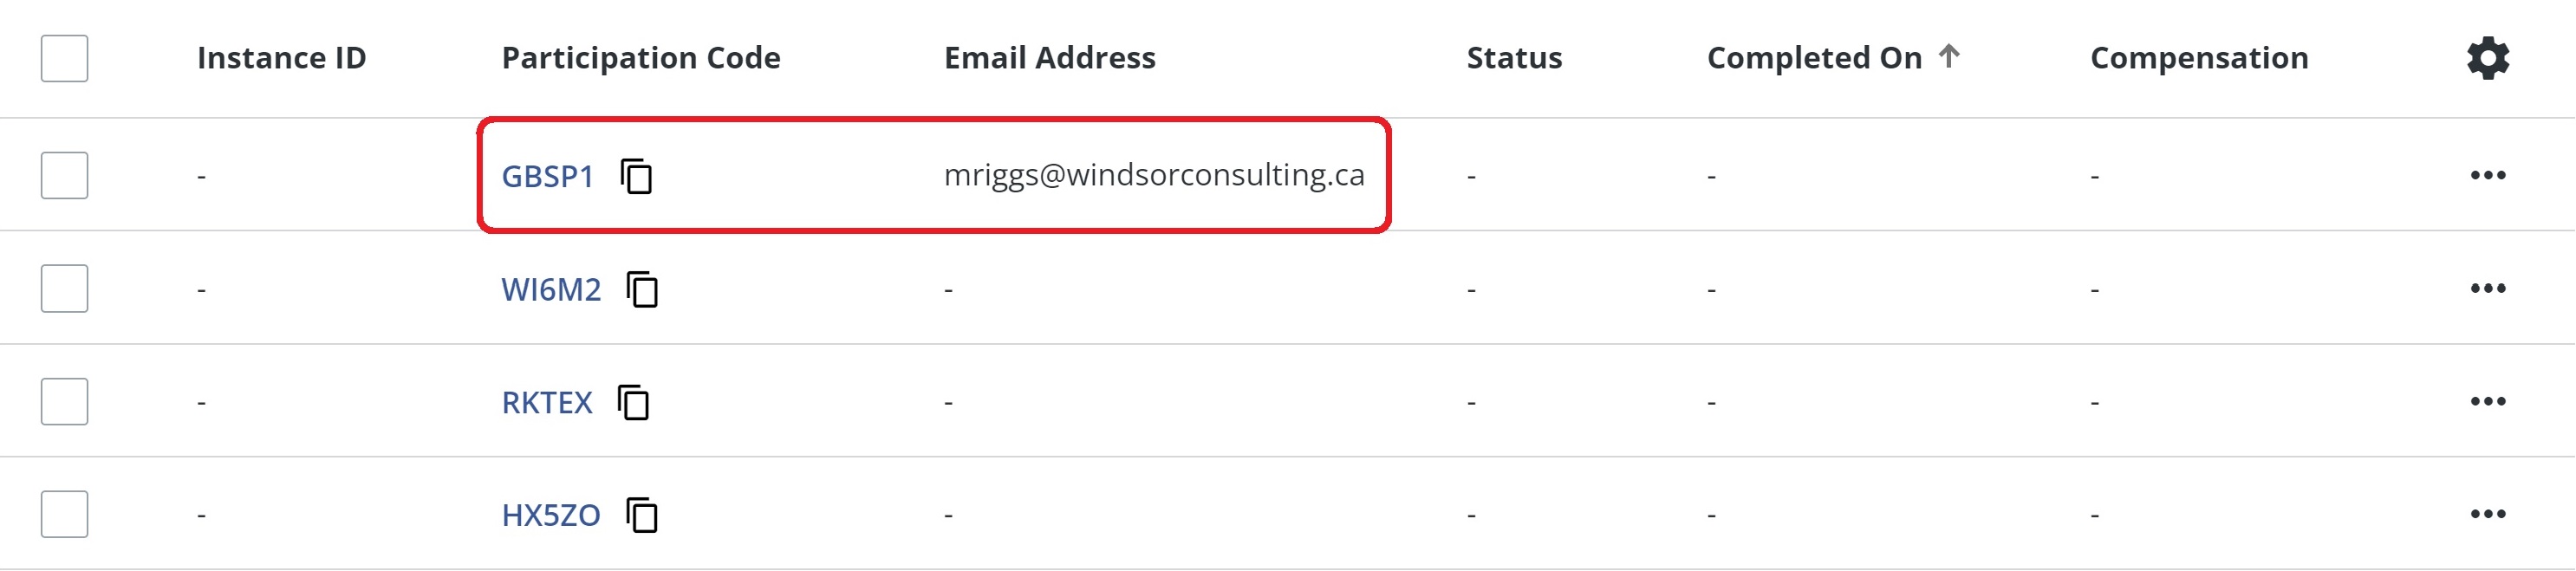
The Participation Code has now been assigned to that email address.
4. Option 2: Import Codes
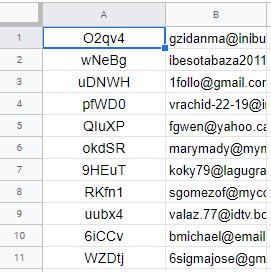
You can bulk-import a number of Participation Codes and the associated email addresses by uploading a csv file. With this option, you will have to generate the Participation Codes yourself.
Important
The csv file should have two columns. Column 1 has the Participation Codes and Column 2 has the email address assigned to each code. You can also just have one column of Participation Codes, if you don't wish to assign email addresses now.
- Click Add Codes.
- Click Import Codes.

- Click Choose a file...
- Find the csv file in your computer.
- Select the file.
- Click Submit. The Participation Codes and email addresses appear. Q Method Software lets you know how many codes were imported and if there were any duplicates.

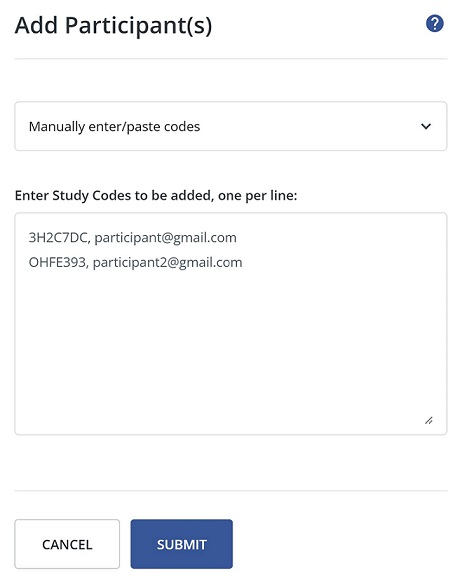
5. Option 3: Manually enter/paste codes
This option is best if you want to add only a few Participation Codes. As with the previous option, you will have to generate the codes yourself.
- Click Add Participants.
- Click Manually enter/paste codes from the drop-down menu.
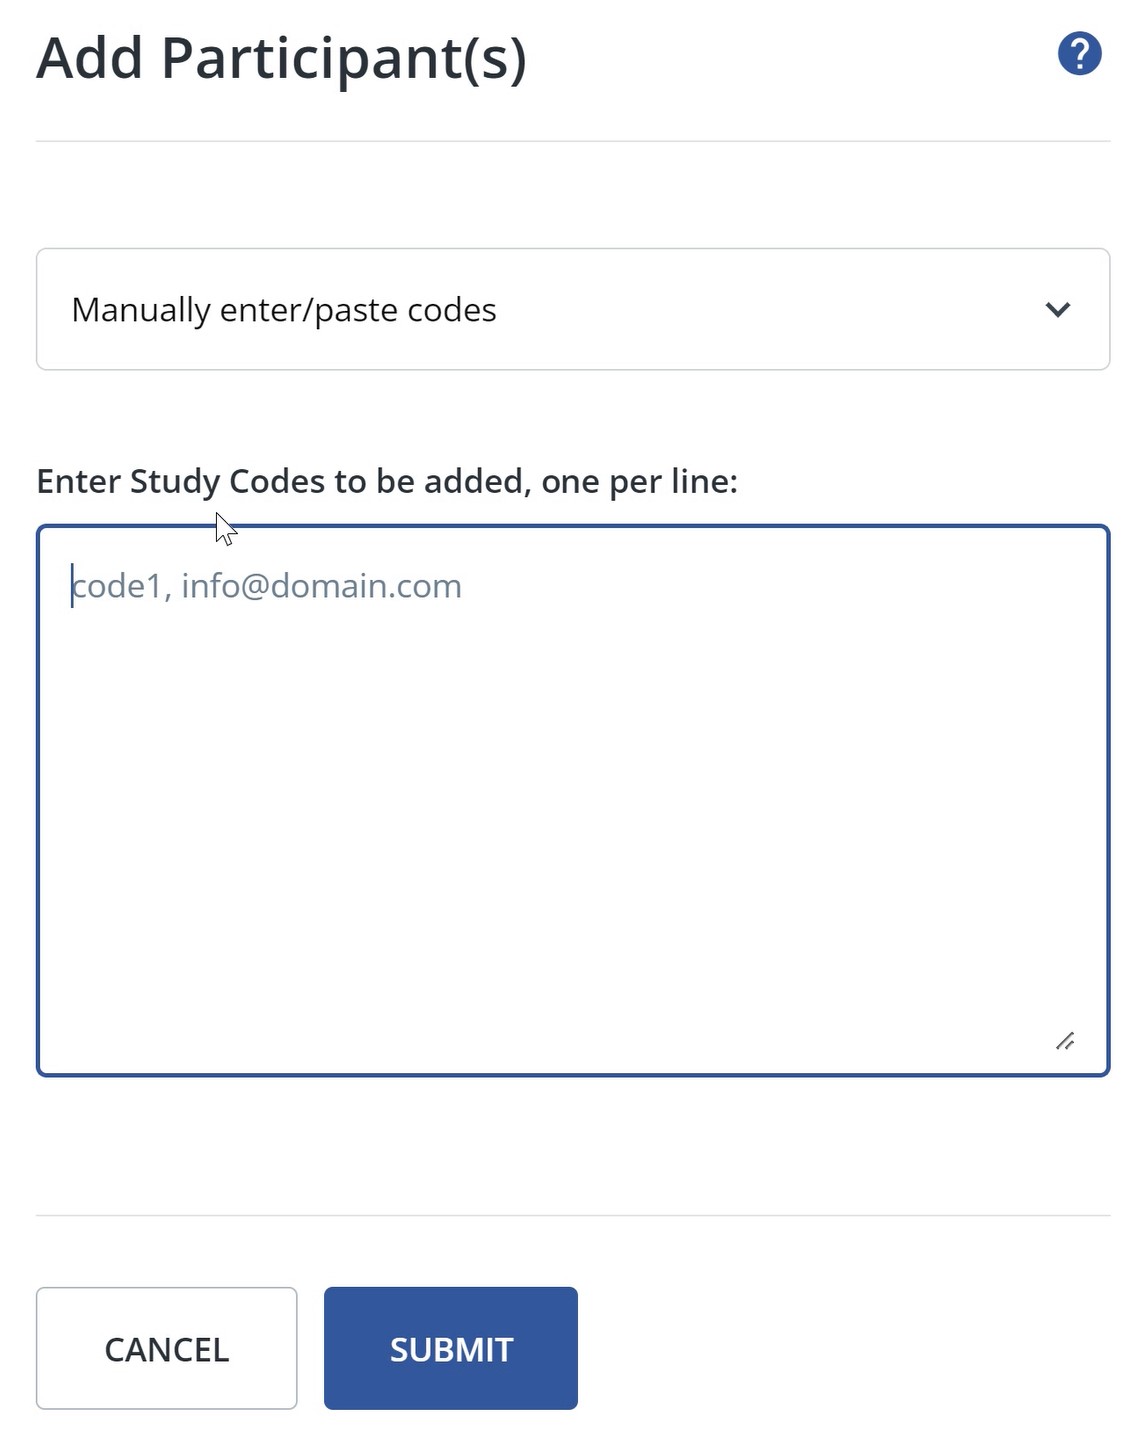
- Type the Participation Code in the text box with the format of: participant code, email.
Note
Optionally, you can also include the email address you want to assign it to. Separate the code and email address with a comma, as shown below. Type only one code and email address per line.
- Click Submit.
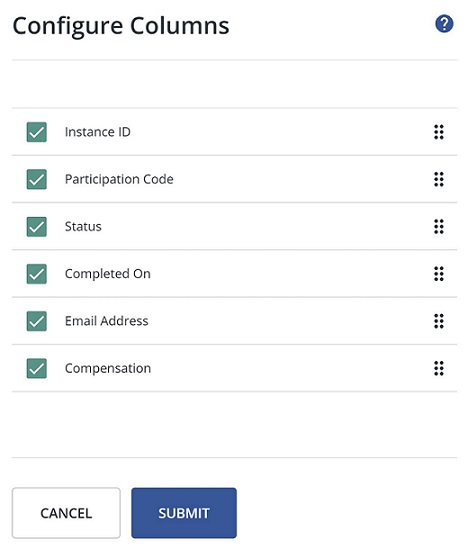
Note
You can configure what information is shown in the Manage Participants table. Click the icon in the last column of the table. Then, check/uncheck each setting you want to be displayed in the table. Click submit to see changes.
Deleting Participation Codes
You can easily remove previously created participation codes that are assigned to your study. However, if the participation code has already been used by a participant, any associated data is also removed when you delete the participation code. This is useful for situations where you want to remove a particular participant’s data from skewing your data, or if you just want to reduce the number of participation codes that are assigned to your study.
Warning
Deleting an already used participation code will remove any data that a participant has submitted for that code. Once the code and data has been deleted, there is no way to restore the data. Please be careful when deleting participation codes, especially if there are submissions tied to them. To delete participation codes, follow these steps:
- Click Manage Participants from the left-hand navigation menu.
- Select the participation code(s) that you wish to delete by clicking the checkbox next to each participation code in the list.
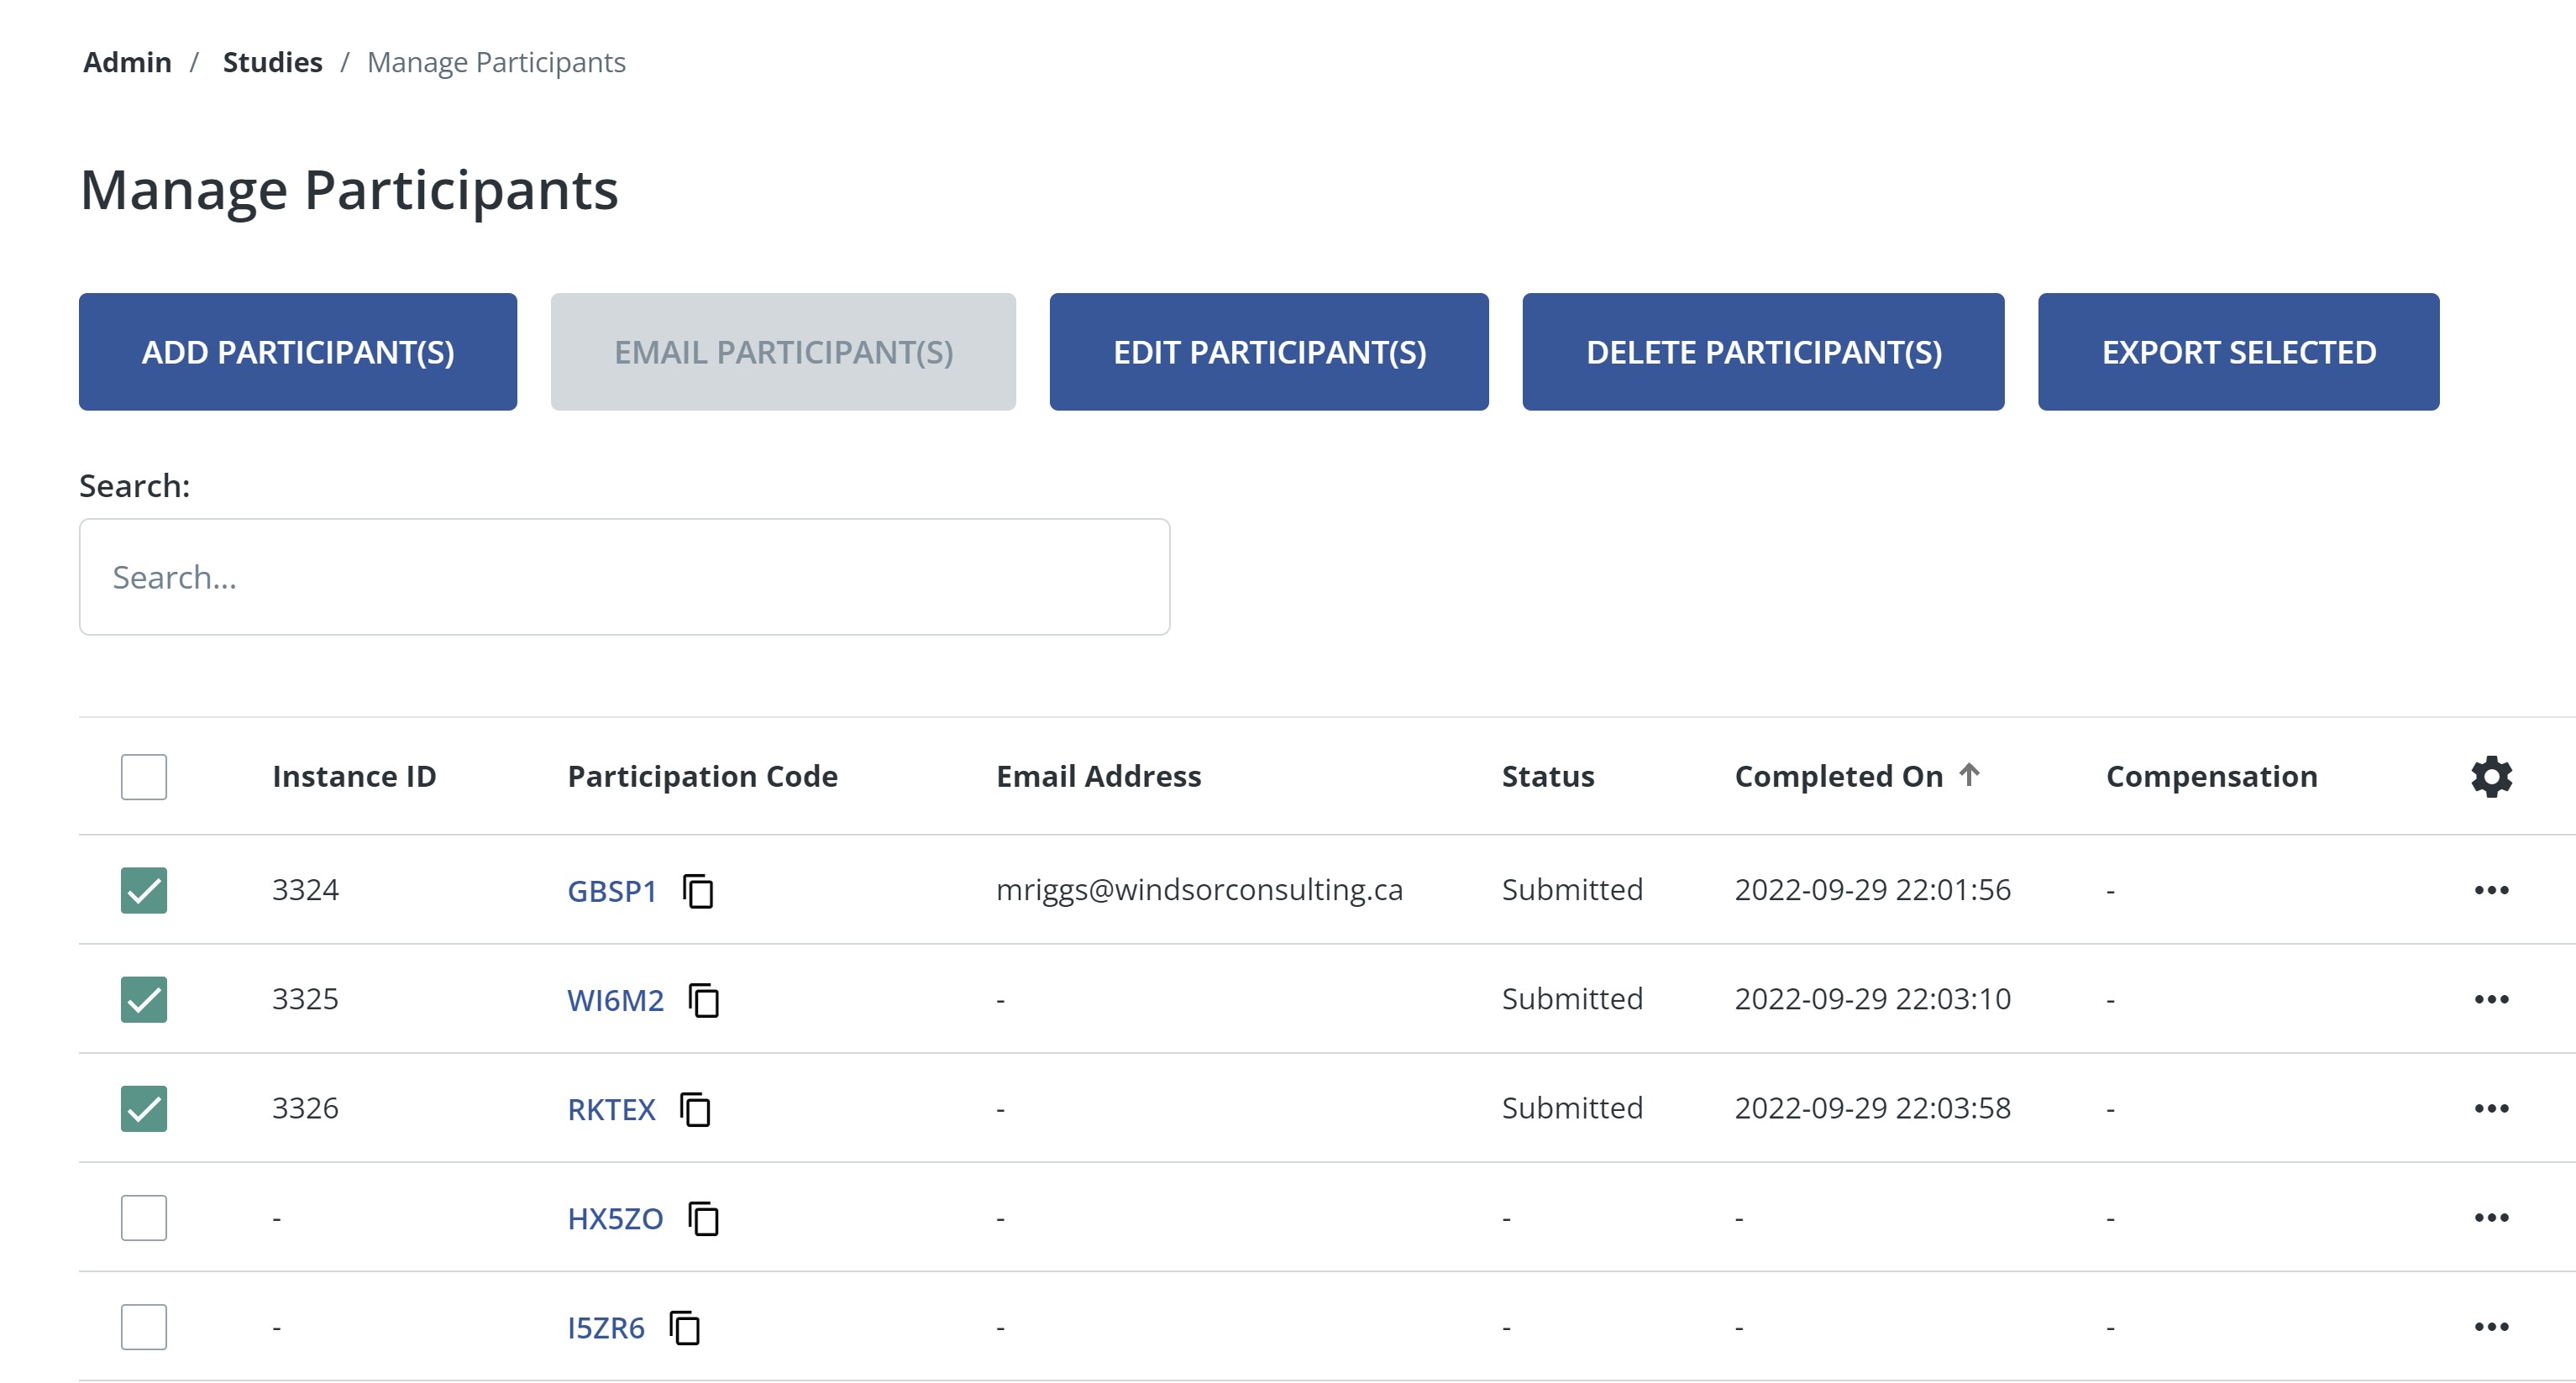
- Click Delete Participant(s).
- In the confirmation panel, select “Yes”

Next Step: Invite Participants to Your Study